Masonry with bricks in the right way
The masonry technique has many thousands of years of history and the masonry profession has always been highly respected. This is probably why many people feel a certain fear of starting to work with the trowel. If you make careful preparations before you start masonry and work calmly, you will soon notice that it is not that difficult after all.
If you have never bricked before, it is a good idea to first test a few rows (shifts) before you start with the actual masonry work. Whether you will succeed in masonry depends on several things.
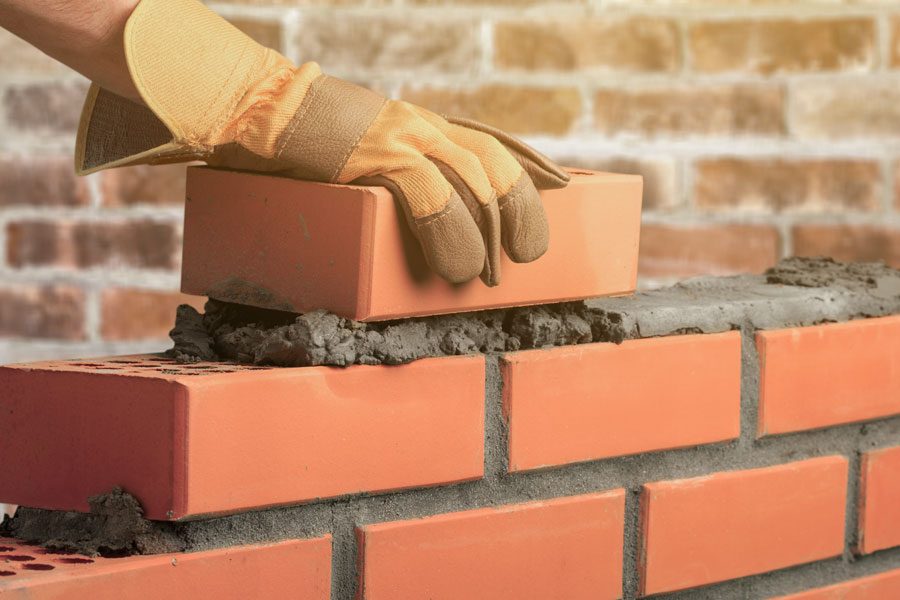
First and foremost, you should get good tools. The trowel is available in several sizes. Choose a ladle considering the work you are going to do, but also considering that you should be able to handle it with mortar on. The ladle gets significantly heavier than you think with just one hand to help.
When ironing the joint, you can choose between two tools, the joint pin or the joint spoon. The ladle is considered easier to use, but the stick is significantly cheaper to buy. If you are going to build a larger work, you must definitely have a drawing of the work, so that you know that all measurements will be correct. Do not forget to include the masonry base in the calculation, otherwise the height measurement will be incorrect.
Before you start masonry, you should also set up studs exactly in plumb. If you mark each shift a brick height plus a joint width on the joists and then follow the markings carefully, you get a completely even joint. In addition, the risk is not so great that you build obliquely when you have the rules as support.
The choice of stone and mortar is of course also important. Brick is made of, among other things, limestone and brick. The former is mainly used for facades while the brick occurs in several contexts.
There are solid bricks and several types of hollow bricks. Hollow bricks, which are cheaper, are used in most masonry work. Solid bricks are used in works where special requirements are placed on the masonry. An example of this is brick fireplaces.
The most common mortar for the layman is dry mortar. This is easy to mix to the right consistency. Follow the instructions on the bag and add the correct amount of water. Then mix very carefully, so that the mortar does not contain lumps, but is airy and smooth.
Mix only for as much use as you plan to get rid of in about an hour when you are going to masonry. After that time, the mill begins to stiffen, separate and the quality deteriorates.
Tools and materials you need when building walls:
Tools:
1. spirit level 2. pencil 3. measuring stick 4. trowel 5. grout or stick 6. mortar tub 7. masonry hammer 8. root brush 9. water hose with sprinkler nozzle 10. bucket. 11. Protective gloves 12. Goggles 13. Dust filter mask (protective mask).
Material:
Bolts, Nails, String, Dry mortar, Bricks, Murkam nails, Brick washing or hydrochloric acid solution in a mixture of 1:10.
Name of the brick surfaces:
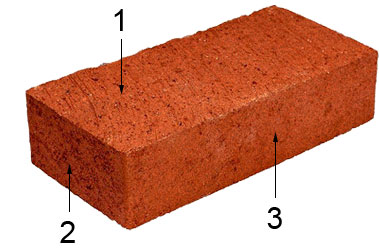
1. Reclining surface
2. Cutting surface
3. Running surface
Worth knowing when to build
The most common masonry joint is when you only lay the stone lengthwise. The next shift is laid evenly, but with a half-stone offset. Monk, running and cross joints are examples of wall joints.
Warning!
Bricks of lime sandstone should not be acid washed as the surface is destroyed by the treatment. You can instead clean the masonry with sandpaper or a hard brush on the water-soaked surface.
If there are still mortar residues left, you can carefully chop them away with a chisel.
Preparation before you have to build a wall
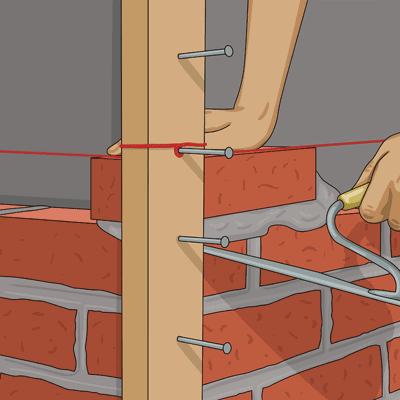
Build a brick wall step 1
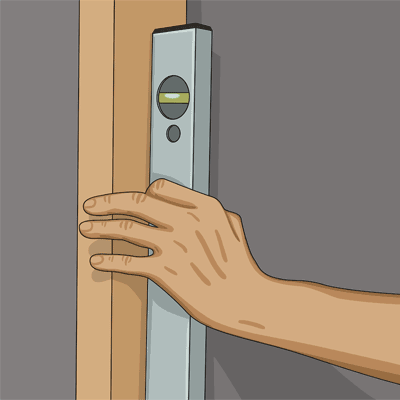
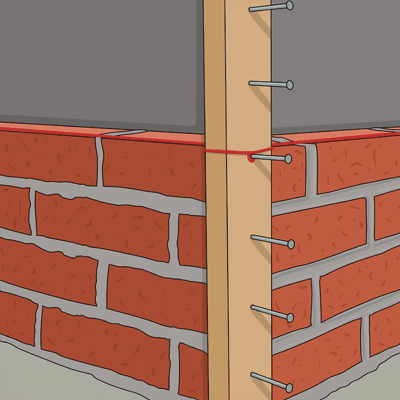
1. Set up joists around the intended masonry. Solder each rule with a spirit level and anchor firmly.
Build a brick wall step 2
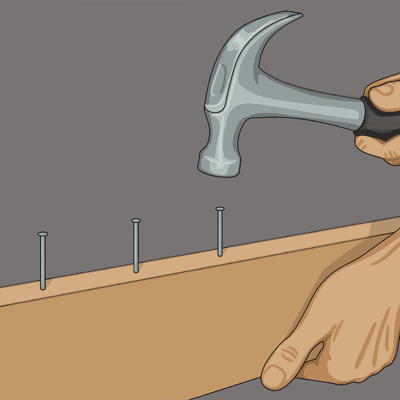
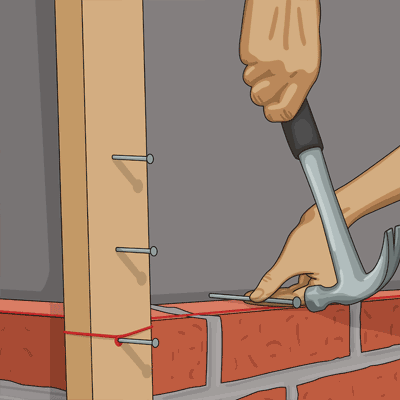
2. Measure and mark the tile shifts with nails so that you can easily move the guideline to a new shift.
Mortar
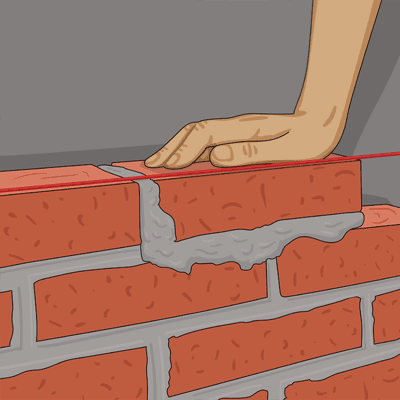
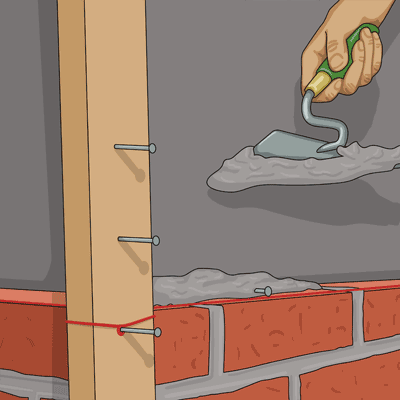
Build a brick wall step 3
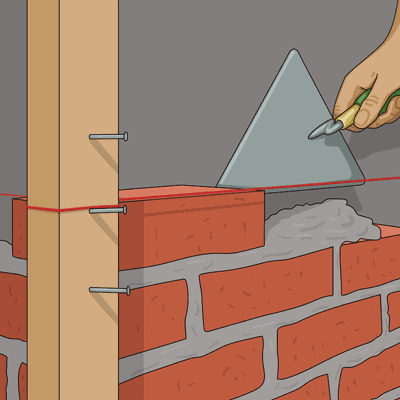
3. Apply plenty of mortar to the substrate and make sure that the joint is filled. Pull out the mortar with the side of the ladle.
Build a brick wall step 4
4. Place mortar on the short side of the stone and make sure that the joint is filled. Smooth with the side of the trowel.
Build a brick wall step 5
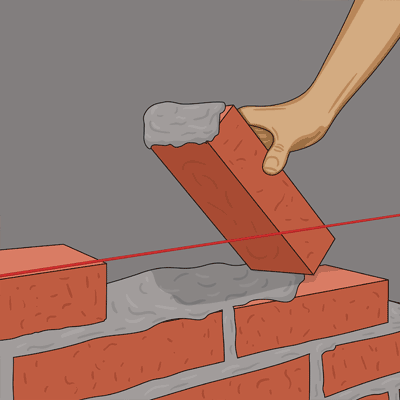
5. Lightly press the brick into place. First downwards and then towards the stone next to it. Be careful and never lift a laid stone.
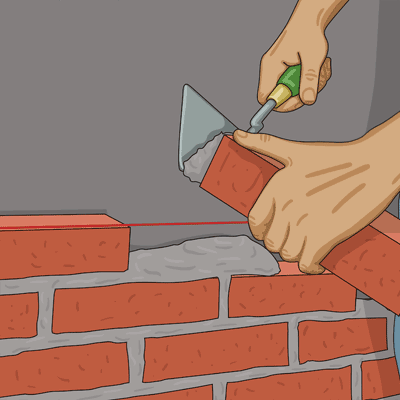
Build a brick wall step 6
6. Check that the stone has come right and cut off excess use with the trowel. The mortar is used for the next joint.
Build a brick wall step 7
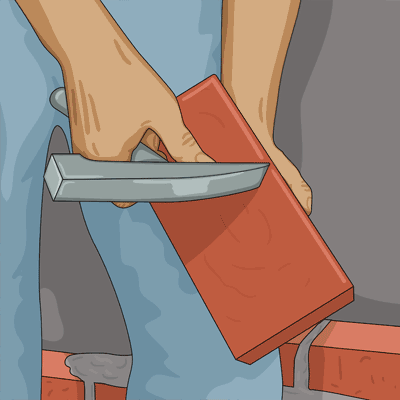
Build a brick wall step 8
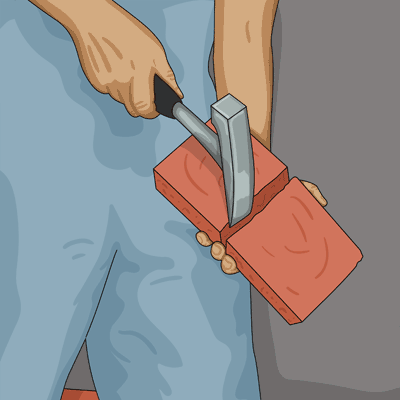
8. Divide the brick at the mark with a specific stroke of the pen. First try a couple of practice stones.
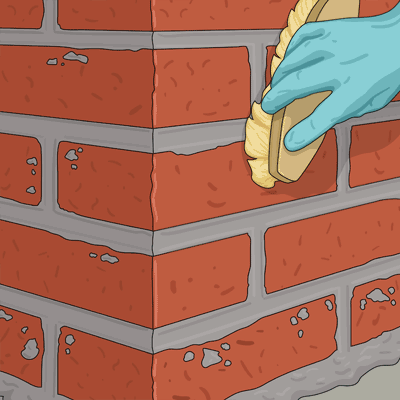
Joints
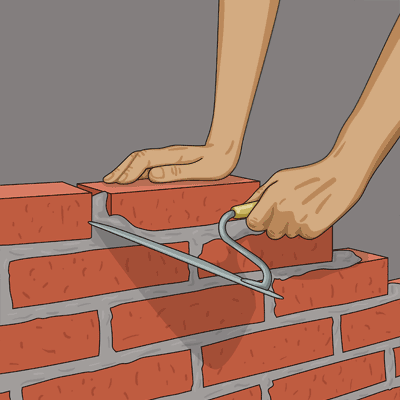
Build a brick wall step 9
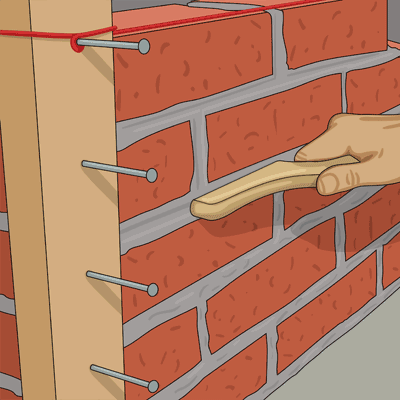
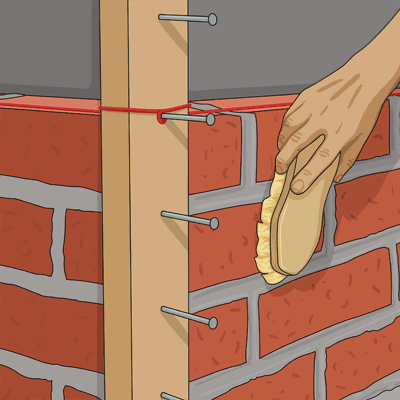
9. After you have bricked a few shifts, apply a joint iron. Use a joint spoon or stick and shape the joint.
Build a brick wall step 10
10. Brush off any excess mortar from joints and stones before the mortar has time to burn.
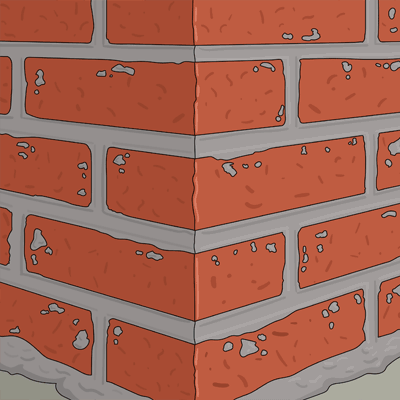
Wall corner
Build a brick wall step 11
11. Always start building a corner. Wall the angle in the first shift and make sure that the stones are inverted in the next.
Build a brick wall step 12
12. Brick up the corner a few shifts. Wall the first several stones out and then reduce so that a step is formed.
Build a brick wall step 13
13. Wall the other walls and corners with the first corner as a point of reference. Let the walls rise at the same time.
Build a brick wall step 14
Build a brick wall step 15
15. Lay mortar over the lying surface and nails and masonry as usual. Use about 2 masonry nails / m2, denser next to a free edge.
Worth knowing about masonry terms
Some wall terms and what they mean:
Lying joint, the horizontal joint. Joint, the vertical joint. Shift height, the sum of the height of a brick and a lying joint. Shackle wall, a masonry outer wall that is not load-bearing, usually anchored in the load-bearing wall.
Tip
A golden rule when masonry is that laid stone lies. However, if you fail and put a stone completely wrong, you can lift it off again immediately. Then scrape off the mortar used for the incorrectly laid stone and widen again. The adhesion deteriorates markedly and the stone adheres poorly if you put the stone back in the same mortar again. This is mainly due to the airiness in the mill disappearing.
Finishing
Build a brick wall step 16
16. Use a spray nozzle and water the wall surface until the wall can remain water-saturated and glossy for about 5 minutes.
Build a brick wall step 17
17. Brush the surface with a hard brush in masonry wash or weak hydrochloric acid solution. Then rinse the wall thoroughly.